Pages

Choosing Tunisian Crochet Hook for Beginners

Tunisian crochet is a subset of crochet craft that shares much resemblance with knitting. Even the stitches have a knit-like look though you use the specialized Tunisian crochet hooks for the craft. They are also known as Interchangeable Tunisian or Afghan crochet hooks. They are different than regular singled ended crochet hooks because of they are used for crocheting. They are longer than typical hooks as in Tunisian crochet, you work on a two-row pattern, the foundation row where you pick up stitches on the crochet hook and work them off in the next row. As you need to carry the stitches on your hook, you need to work with an interchangeable cord to get the right length. This is even for crocheting in the round, you will need a cord to work out the circumference. So, if you are just starting, let us guide you through choosing the best Tunisian crochet hooks for beginners.

Tunisian crochet hooks

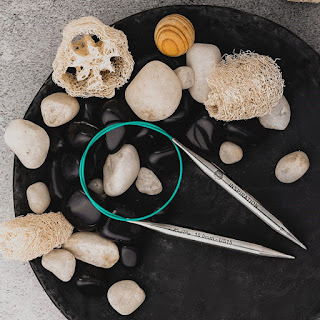
Tunisian crochet hooks with interchangeable circular cables

An interchangeable Tunisian crochet hook consists of a hook that has a base which can be attached to a flexible cord of different lengths. It is much like the tip of the interchangeable circular knitting needle with the difference that instead of a pointy tip on the other end you have a hook. Essentially, the cord holds the stitches. The interchangeable crochet hooks allows to switch out different cord lengths with the various size crochet hook heads. You can connect the right length according to the need of the project. Interchangeable Tunisian crochet hooks can be bought individually or in a set. The different hook sizes and varying cord lengths make it an ultimate choice as one set can be used to work multiple projects and not just Tunisian but almost all kinds of crochet. If you do not attach the cord, the hook is free for other crochet stitches.

Though the interchangeable Tunisian crochet hooks are the most popular, the other options are similar to single ended crochet hook but are a lot longer than typical hooks. Similar to single pointed knitting needles, there is one hook on end and a stopper on the other end. This prevent loops from falling off the other end so they can hold many stitches and give more room to work.

The other type of are double ended crochet hooks much like the double pointed knitting needles (DPNs). With hooks on either end, it is most frequently used when working Tunisian crochet in the round. The crochet hook allows to grab stitches from both ends. It also used for colorwork in crochet as both hooks can work on different colors of yarn at the same time.

So, now that you know about the Tunisian crochet hooks, here’s what you need to know before choosing one.

  • Choose the right hook size. As with regular crochet, you’ll use a crochet hook size that corresponds with yarn weight. You’ll find the hook size mentioned on the yarn label or the pattern. Many crocheters recommend to use a hook that’s 1-2 sizes above the standard given for a yarn for Tunisian crochet a sit tends to be tighter than regular crochet.


  • Consider the hook length. If you are working on a scarf or a dishcloth, make sure to have the right length so that the stitches can easily stay on the hook and crud length.
  • Gather your regular crochet supplies for your craft. Make sure you have accessories such as stitch markers, a tapestry needle, a row counter and a tape measure. 

With the right crochet hooks and accessories from Knitter’s Pride you can begin with Tunisian crochet! Choose our Symfonzie Dreamz or Ginger range if you are a fan of working with wood. Bamboo Tunisian crochet hook sets are ideal for beginners as well as advanced makers.

Ready to begin? Happy crafting with Tunisian Crochet Hooks!

Knitting in the Round on Circular Knitting Needles for Beginners

Circular knitting needles are as the name implies, crafted to knit a circle, also known as knitting in the round. Once you are proficient in the basics of knitting, it is necessary to begin a seamless pattern. This may appear to be daunting, but that is not the case. Knitting in the round is an uncomplicated technique to master. The knitting needles are connected with a cord and the length of the cord required is based upon the number of stitches you are dealing with. If the pattern involves an increasing or decreasing amount of stitches, then you would need to replace the needles with either a shorter or longer cable respectively.

Knitting in the Round on Circular Knitting Needles for Beginners

Knitting in the Round with Circular Needles

Circular needles are meant to do what regular needles cannot do: knit a smooth round tube. Items such as hats, sweaters, socks, and mittens all consist of a circular design. The marvel of knitting in the round is that the tube is created the instant the cast on is complete. The outcome is a seamless tube that can be altered into any design you desire with the assistance of increasing and decreasing.

Circular knitting needles are the most diverse needle type available. For over a century, they have helped knit projects, whether they be round or flat. The majority of knitters who have discovered the comfort of circular needles stick to them permanently. These needles offer ergonomic convenience as the needle tips are joined together with a smooth and flexible cord of various lengths. If the needles are adjustable, then you can modify the cord size accordingly. Even beginners are able to manage knitting with circular needles.

Here are the key points when picking the correct circular knitting needles:

• When knitting in the round, you are always knitting on the front of the work, as there is no need to “turn” the needle to knit on the wrong side.

• The round technique is much faster than knitting flat.

• Knitting in the round yields a seamless tube-like fabric. There are no seams.

Five steps to knitting in the round:

1. Cast on using your preferred method onto the circular needle. As you cast stitches on one needle tip and then spread it over the cord till it gets to the other needle tip.

2. Rotate the cast on stitches so that it faces the same direction to stop the stitches from twisting. Now you need to join the yarn so that it becomes a round. There are many methods to join the round. You can use a simple step such as casting an extra stitch and slipping it to the other needle tip and join the round.

3. Ensure that the yarn is on the left hand needle tip. Add a stitch marker to mark the first stitch of the round. You can use a round stitch marker or if you have forgotten to place one, then use a locking stitch marker.

4. Push the stitches near to the tips of the needles. The rule of knitting in the round with circular needles is the length of the needle should always be smaller than the circumference of the project so that the stitches are not stretched.

5. Use the right needle to knit the first stitch from the left needle and pull tight.

Additional elements to remember when choosing circular knitting needles:

1. Always select a circular needle with a length that is slightly less than the width of your knitting, as this allows the stitches to flow across the needles as you knit.

2. Make sure that the stitches spread around the whole cable and to the right-hand needle tip.

3. Before beginning to knit, double check that the cast-on stitches are not tangled around the cable.

4. When working in the round, there is no need to turn the work over. The right-side will always be visible.

After you’ve had enough practice knitting with a single circular needle, then you can try out working with other methods. The magic loop technique of knitting in the round with circular needles is used for small circumference projects such as baby socks and clothes. As the rule of circular knitting is the needle length should be smaller than the circumference of the project.

Another method is knitting with two circular needles. This technique gives freedom for working on small to large circumference projects. Just make sure that you work with same length and size of circular needles.

If you own a set of interchangeable circular knitting needles, this provides much freedom as it means you do not have to purchase a new set of needles every time you commence a new project. You are able to merge different cables and needles to generate multiple exciting patterns and use the other cables as stitch holders. The needles can also be used for flat patterns, besides knitting in the round.