Pages

How I Love Hearts?

What says “love” faster and better than a heart symbol?  Whether you draw them, sign off with one or simply post one in an email – nothing conveys your affection faster than a heart.

How I Love Hearts?

Hearts are also surprisingly easy to make choice of knitting needles (double point needles, straight needles,) or a crochet hook and a little bit of yarn.    Just think of all that left over red yarn that can be turned into tokens of affection!

There are many ideas online which explain how easy it is to make them and how to use them. Hearts can be used as ornaments on packages as well as on Holiday trees and plants.  They can be put into an envelope of your own making, Here’s a free pattern for one. 

free pattern

They make wonderful 3-D gifts on Valentine’s day. You can knit a little heart and mail them off or you can fill them with a small bag of lavender buds and use them as sachets.  Each of these ideas are easy to find online. 

knit a little heart

Here's a link to a video where you can see how to knit a heart in no time at all.

Hearts are also very easy to crochet.  They are fast and a fabulous last-minute gift for anyone who appreciates your “heart” felt work. Here’s a link to some highly recommended crochet hooks and to a free pattern.

heart

It makes sense to buy a set of crochet hooks because a change of hook size can let you makes these sweethearts in more than one size.  For instance, use a bigger hook and thicker yarn and create a hot pad for your table.  Use a thinner hook and make scads of little hearts and toss them into a holiday or birthday card envelope. How much fun it would be to open it and let your loved one see your affection. 

The most important part of these heart making projects is your time and your talent.  To combine those 2 elements in one project – knitted or crochet – is a tangible expression of your love. Be sure to take the time to love yourself, as well.

Everything You Need to Know about Punch Needle Embroidery

Punch needle embroidery has been gaining popularity in the crafting world for its unique texture and versatility. If you're a fan of crafting and looking to explore a new technique, this fun craft might be just the creative outlet you're seeking. In this comprehensive guide, we'll delve into the world of punch needle embroidery, from understanding the basics to exploring the benefits and tools like the punch needle set that can enhance your crafting experience.

Everything You Need to Know about Punch Needle Embroidery

Understanding Punch Needle Embroidery

The unique technique involves creating textured designs on fabric using a special tool called a punch needle. The result is a series of loops on one side of the fabric, creating a textured, almost rug-like appearance on the other side.

How Punch Needle Works

The Punch needle embroidery is very easy. It works by threading yarn or embroidery floss through the hollow needle, which is then punched through the fabric in a repetitive motion. The length of the loops can be adjusted using the depth gauge on the punch needle, allowing for different textures and effects. The yarn is held taut on the fabric's surface, creating a vibrant and visually appealing design.

Benefits of Punch Needle Embroidery

The embroidery craft offers several benefits that make it a rewarding craft to explore. Firstly, its unique texture adds depth and dimension to your designs, making them stand out in a visually striking way. Additionally, punch needle embroidery is relatively quick to learn and execute, making it accessible for both beginners and experienced crafters. The versatility of this technique allows you to create a wide range of projects, from wall hangings and pillows to clothing embellishments and more.

Exploring Punch Needle Sets

If you're eager to dive into the world of this embroidery, investing in a punch needle set is a wise choice. A kit typically includes different punch needle needle sizes, allowing you to experiment with various yarn weights and fabric types. It may also include additional accessories such as threaders and embroidery hoops to enhance your crafting experience.

Getting Started with Punch Needle Embroidery

To begin your punch needle embroidery journey, here are the basic steps you'll need to follow:

Choose Your Fabric: Select a fabric that is suitable for punch needle embroidery, such as monk's cloth or tightly woven cotton.

Thread Your Needle: Thread the punch needle with your chosen yarn or embroidery floss. The yarn should be cut to a length that is comfortable to work with.

Start Punching: Position the punch needle on the fabric and gently punch it through. Pull the needle up, leaving a loop on the back side of the fabric.

Repeat: Continue punching the needle through the fabric, creating a series of loops. Experiment with different colors and textures to achieve your desired design.

Finish and Secure: Once your design is complete, flip the fabric over and trim any excess loops. To secure the loops in place, you can apply a fabric glue or stitch along the edges.

Conclusion

Punch needle embroidery is a captivating and versatile craft that allows you to create textured and visually appealing designs on fabric. With its unique technique and distinctive texture, the beautiful craft offers a fresh perspective for both seasoned crafters and beginners alike. Investing in a punch needle set can provide you with the tools and accessories needed to fully immerse yourself in this creative journey. So, gather your materials, thread your punch needle, and let your imagination run wild as you explore the world of punch needle embroidery.

How to Punch Needle for Beginners?

Punch needle embroidery is a versatile and popular form of art that is gaining popularity among beginners and experienced crafters alike. The beauty of punch needle art is that it is wonderful for people of all ages. With its unique technique and stunning finished results, punch needle offers a fun and creative way to express your artistic vision.

Whether you're new to embroidery or an experienced stitcher looking to try something new, this blog will provide you with everything you need to get started with punch needle embroidery as a beginner. Get ready to create beautiful textile masterpieces with our comprehensive punch needle set guide for beginners.

Punch Needle

Gather the Required Tools and Materials

1.      Punch Needle Kit

Punch Needle is a specialized tool with a hollow handle and a needle-like tip that punches through the fabric. There are different types and sizes of punch needles available, so choose one suitable for your project. The needles are available in different sizes usually fitted to an ergonomic handle. With punch needle kits, you can get multiple needle tips in different sizes that work with different yarn weights. This gives you the best opportunity to experiment with the craft.

2.       Fabric or Fabric Frame

Not all fabrics are suitable for punch needle embroidery, such as weaver's cloth or monk's cloth and you can get it framed or work with an embroidery hoop. These fabrics have a tight weave and can withstand the tension created by the needle. You can get pre-stretched frames in different sizes for projects that you can display as home décor.

3.      Yarn or Thread

There is a wide range yarns that are suitable for punch needle art. This also depend on the needle size of the punch hook. Thicker yarns are commonly used for a more textured look, while thinner threads are ideal for intricate designs.

4.       Accessories

Just like knitting and crocheting, there are many multiple accessories that work for Scissors: You'll need a pair of scissors to trim excess yarn or thread. Do carry a pen or pencil to trace the design on the fabric.

Now with all your supplies ready, get started with exploring the prospects of the craft. Starting with punch needle embroidery opens up a world of creative possibilities. Unlike knitting and crocheting there are no stitches and techniques in working punch needle.

Here’s a quick tutorial.

·         Trace the design on the fabric. You can use anything that properly prints the design.

·         Thread your punch needle with the right yarn weight.

·         Punch the needle tip through the fabric all the way through.

·         Pull out the needle back and you can see a yarn loop on the fabric.

·         Continue punching through the design.

Here are five things you can make using punch needle art:

Wall Hangings: With punch needle sets and fabric frame you can create wall art pieces of punch needle embroidery. You can choose a design or create your own pattern. Experiment with different yarns and colors to add depth and visual interest to your wall art.

Pillows: The beautiful textures of punch needle art makes beautiful home décor. Create intricate patterns on fabric, and then sew the fabric into pillow covers.

Tote Bags: Customize a plain tote bag with punch needle to create a design on the fabric of the bag, such as floral motifs or geometric patterns. This transforms a simple bag into a fashionable accessory.

Clothing Embellishments: Elevate your wardrobe and embellish items like t-shirts, denim jackets, or even hats with intricate punch needle designs. This allows you to give a personal touch to your garments and make them truly one-of-a-kind.

Coasters and Placemats: Make functional and decorative coasters and placemats using punch needle embroidery. Choose a sturdy fabric and create patterns that are both visually appealing and practical. These items not only protect your table surfaces but also add a touch of handmade beauty to your dining area.

Get ready to enjoy with Knitter’s Pride new punch needle sets. Let your creativity shine!

10 Helpful Tips for Every Knitter

 Every knitter is unique. Be it beginner, intermediate or even an advanced knitter, each one has their own style. Knitting is fun, you get to use your creativity and transform yarn with your knitting needles into a garment or accessory or a wonderful gift for a loved one. If you're new to knitting, you are taught the strings of the craft by a mentor or an online source. But when you gain experience and branch out to for advanced knitting projects, you will need to keep a few knitting tips in mind for a smooth crafting experience. Even if you are a beginner working with basic knitting projects, there are a few tips that can help you get started and make your knitting journey more enjoyable.

Helpful Tips for Every knitter

  1. Practice makes perfect

Knitting is not just about the finished product, it's also about the process. Enjoy the feeling of the yarn running through your fingers, the rhythm of the needles, and the sense of accomplishment when you complete a project. Knitting takes practice, so don't get discouraged if your first few projects don't turn out perfectly. With practice you'll improve over time.

  1. Choose the right yarn

Different yarns have different properties, so choose a yarn that's appropriate for your project. If you are making socks, the yarn requirement is different than when you are making a blanket, therefore before you begin a project consider factors like fiber content, weight, and texture. This will help you work faster and smoothly.

  1. Use the right tools

The right tools is the main reason for the success of your project. Get started with right knitting needles. This means not just the size and type mentioned by a pattern designer, but by also making a gauge swatch. If you are going to go back and forth, work with single pointed needles or circulars (of the right length). If it’s knitting in the round, the iotions are double pointed needles (DPNs), circular knitting needle (a size smaller than the circumference of the project), two circulars or magic loop technique (with a length that is between 32” to 47”.

Besides, work with stitch markers, measuring tapes, wool needles, blocking tools, etc.

  1. Read the pattern carefully

Before you start knitting, read the pattern carefully to make sure you understand the instructions. Pay attention to things like gauge, stitch counts, and shaping instructions.

  1. Take breaks

Knitting can be relaxing, but it's important to take breaks to avoid hand and wrist strain. Take breaks every 30 minutes or so to stretch your hands and rest your eyes.

  1. Don't hesitate to ask for help

If you're stuck on a pattern or technique, don't be afraid to ask for help. There are many online resources and knitting communities that can provide support and advice. Even for small knitting mistakes, get help. Mistakes happen, even to experienced knitters. Don't be afraid to make mistakes, and don't be too hard on yourself when they happen. They can be fixed or even incorporated into your design. Knitting accessories are a great help to smooth knitting experience and avoid mistakes. Work with stitch markers to avoid common knitting mistakes. You can also keep a handy repair hook or crochet hook for dropped stitches. Learning to tink (unknit) can also be helpful to correct your silly mistakes.

  1. Have fun

Knitting should be fun, so choose projects that you enjoy and don't be afraid to experiment with new techniques and patterns.

With these helpful tips, continue enjoying the craft of knitting! With Knitter’s Pride explore the widest range of knitting needles and knitting accessories. From stitch markers to wool winders, handy repair hooks to scissors, bags and cases to keep you organized, get ready for a smooth knitting experience.

Source: https://www.flokii.com/blogs/view/85523

Straight VS Circular Knitting Needles

Knitting needles come in a variety of styles, sizes and materials. You can knit with any pair of needles, but for best results, you must choose that works best for you. Knitting with straight or circular needles doesn't affect the difficulty or ease but depends on a specific pattern or project. You can definitely knit with both types of needles but it's a personal choice when working on a specific project. There is no discussion on straight versus circular, it is based on the pattern requirement and also in a way the comfort or skill levels of knitters.

Let’s explain with an example. If you want to knit a sweater you can make it on any knitting needle. You can knit it back and forth and then seam the back and front as well as sleeves or you can knit round from the neckline or from the bottom. Both needles will create a perfect sweater but the comfort of working with them entirely lies with you.

In this blog, the reference of needles changes; it is not the design of the needle but the pupose of knitting. For knitting back and forth the options are single-pointed as well as circular needles. And, for circular knitting, you would require double-pointed needles as well as circular needles.

What is the difference between straight and circular? 

To start with, remember that all knitting needles are in a way straight; they are with pointy tips, smooth surfaces, shaped like the magic wand. The needles and tips are pointed to work with all types of yarn. In the category of straight needles, you can count both single-pointed as well as double-pointed needles while circular needles come in varieties of fixed and interchangeable ones. But, when it comes to using and basically knitting style straight is referred to as knitting back and forth while circular is referred to as knitting in rounds. When knitting flat pieces, you need to work the project in rows. The straight needle's long shape can result in heavier needles that stress your hands and wrists. Also, sometimes, it can be difficult to cast as many stitches on straight needles because of the limited space available.

Similarities between knitting with straights and circulars

Though the double-pointed needles (DPNs) are also straight they can be used for circular knitting. The set of five needles works together, with 3 or 4 needles creating a perimeter and the extra needle used for knitting. But, it also does not mean that you cannot knit back and forth with it. Many advanced knitters knit up a swatch or small projects with two needles of the set.

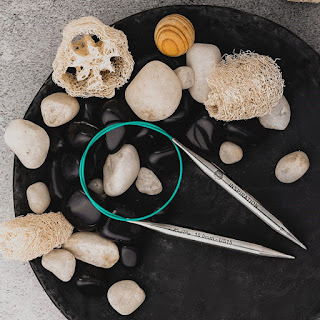
Circular knitting needles perform the same tasks as straight ones. They can be used to knit flat pieces and work in rows as well as patterns that are worked in the round. The needle tips are shorter in comparison to straights resulting in lighter needles. The flexible cord that lies attached to the tips carries the weight of the project. The cord length in the case of interchangeable circular needles can be switched which gives freedom to work with as many stitches as the pattern demands. You can knit a pair of socks and even a blanket with the same needle as long as you have the right cord length. Also, the circulars along with cords can be rolled up, making them convenient while storing or on the go. 

Now, that we’ve discussed everything about straight and circular knitting needles, get ready to cast on your projects. A knitter can choose to express their creativity and make a knitted fabric in any way they want. Like every knitter is unique so are knitting needles, so it best to have them all in your craft collection!

Knitter’s Pride has the widest range of knitting needles, crochet hooks and accessories. The knitting needles cater to beginner to advanced knitters. Explore single pointed needles or sets of double points (DPNs) or fixed circulars or interchangeable circular needles and sets. Available in standard sizes in materials such as bamboo, wood, stainless steel, metals, acrylics and more.

5 Common Knitting Mistakes and How to Correct Them

Mistakes in knitting are a part of the learning curve. When you transform yarn with your knitting needles into your favorite sweater or socks, hats or a gift for a loved one, you may come across some issues. All of us have been there at one point or another making knitting mistakes. But, the trick is to know how to fix knitting mistakes. Many times it is seen that knitters who make a mistake in knitting and don’t know how to fix it, eventually rip out all their work or end up putting their project aside. Knitters often end up starting another project or taking a break from knitting altogether. To stay focused on knitting and enjoy the meditative aspects of the craft, it is important that we learn about common knitting mistakes and how to correct them.

Common Knitting Mistakes and How to Correct Them

Stephanie Pearl-McPhee, a popular knitter also known by the name of the Yarn Harlot, writes in her book Knitting Rules, “It's only knitting and it's one of the few times in your life when there are no bad consequences to a mistake.”

1. Choosing the Wrong Yarn or Knitting Needle

Choosing the wrong yarn or knitting needle is a disaster. Your project won’t turn out the way you wanted it to. So, the trick to correct this common knitting mistake is not cast on stitches as soon as you have the pattern, but carefully choose the knitting needles and yarn and work on a small swatch. If you find your stitches slipping or being too grabby, choose knitting needles and yarn material according to your requirement.

2. Not understanding your Gauge

Gauge is the count of stitches in a particular length of knitted fabric. Every pattern designer mentions the gauge and even if you follow the exact instructions, you may still have different results. It is because not all knitters stitch the same way. Some make tighter stitches while others have a very loose hand. A gauge swatch is very important for all your knitting projects and missing making one is a mistake. The gauge will indicate if you have the right knitting needle size, yarn weight and the overall look of the knitted fabric. It also helps you calculate the amount of yarn needed for the project.

3. The wrong cast on

The first step of every knitting project is to cast on stitches. There are many ways to cast stitches some require them to be stretchy and loose while some may require a constricted look. A common knitting mistake is working one cast-on method on all projects. This will only bring more problems to the project, ultimately making you want to rip out the stitches and begin again. To correct this, always use the appropriate cast-on method for your swatch. Or, work the cast on with knitting needles, a size or two bigger than the one you’ll be using for the pattern.

4. Too tight stitches

Common knitting mistakes, especially for beginners too tight stitches are a problem in every way. You will find it difficult to insert the knitting needle to make stitches or view them properly. This happens when you pull the yarn too tightly scared of dropping stitches or if the yarn is too slippery.

To correct this mistake, it is best you avoid it. Work with a bigger knitting needle size or a material such as stainless steel or metals. You can also play around with yarn tensioning.

5. Not keep a count of rows

Knitting is a game of counting but many times knitters do lose the count. It may be because they got busy chatting or somebody asked for them or they got lost in a complicated pattern such as colourwork or lace.

To correct this mistake you will have to unravel as the pattern will go awry. The trick to avoid this mistake is to use stitch markers at regular intervals. A row counter is also great to work with. There are options for row counters that fit on your knitting needles, clicky, row counter rings and more. Many knitters love the row counter rings, as they make beautiful jewelry and show your status as a proud knitter.

To conclude, besides these five common ones, there are many mistakes that you as a beginner might make but don’t take them harshly. Each mistake is a lesson and with time, you will get better. The key to avoiding common knitting mistakes is working with high-quality knitting needles and practice.

Choosing Tunisian Crochet Hook for Beginners

Tunisian crochet is a subset of crochet craft that shares much resemblance with knitting. Even the stitches have a knit-like look though you use the specialized Tunisian crochet hooks for the craft. They are also known as Interchangeable Tunisian or Afghan crochet hooks. They are different than regular singled ended crochet hooks because of they are used for crocheting. They are longer than typical hooks as in Tunisian crochet, you work on a two-row pattern, the foundation row where you pick up stitches on the crochet hook and work them off in the next row. As you need to carry the stitches on your hook, you need to work with an interchangeable cord to get the right length. This is even for crocheting in the round, you will need a cord to work out the circumference. So, if you are just starting, let us guide you through choosing the best Tunisian crochet hooks for beginners.

Tunisian crochet hooks

Tunisian crochet hooks with interchangeable circular cables

An interchangeable Tunisian crochet hook consists of a hook that has a base which can be attached to a flexible cord of different lengths. It is much like the tip of the interchangeable circular knitting needle with the difference that instead of a pointy tip on the other end you have a hook. Essentially, the cord holds the stitches. The interchangeable crochet hooks allows to switch out different cord lengths with the various size crochet hook heads. You can connect the right length according to the need of the project. Interchangeable Tunisian crochet hooks can be bought individually or in a set. The different hook sizes and varying cord lengths make it an ultimate choice as one set can be used to work multiple projects and not just Tunisian but almost all kinds of crochet. If you do not attach the cord, the hook is free for other crochet stitches.

Though the interchangeable Tunisian crochet hooks are the most popular, the other options are similar to single ended crochet hook but are a lot longer than typical hooks. Similar to single pointed knitting needles, there is one hook on end and a stopper on the other end. This prevent loops from falling off the other end so they can hold many stitches and give more room to work.

The other type of are double ended crochet hooks much like the double pointed knitting needles (DPNs). With hooks on either end, it is most frequently used when working Tunisian crochet in the round. The crochet hook allows to grab stitches from both ends. It also used for colorwork in crochet as both hooks can work on different colors of yarn at the same time.

So, now that you know about the Tunisian crochet hooks, here’s what you need to know before choosing one.

  • Choose the right hook size. As with regular crochet, you’ll use a crochet hook size that corresponds with yarn weight. You’ll find the hook size mentioned on the yarn label or the pattern. Many crocheters recommend to use a hook that’s 1-2 sizes above the standard given for a yarn for Tunisian crochet a sit tends to be tighter than regular crochet.


  • Consider the hook length. If you are working on a scarf or a dishcloth, make sure to have the right length so that the stitches can easily stay on the hook and crud length.
  • Gather your regular crochet supplies for your craft. Make sure you have accessories such as stitch markers, a tapestry needle, a row counter and a tape measure. 

With the right crochet hooks and accessories from Knitter’s Pride you can begin with Tunisian crochet! Choose our Symfonzie Dreamz or Ginger range if you are a fan of working with wood. Bamboo Tunisian crochet hook sets are ideal for beginners as well as advanced makers.

Ready to begin? Happy crafting with Tunisian Crochet Hooks!

Knitting in the Round on Circular Knitting Needles for Beginners

Circular knitting needles are as the name implies, crafted to knit a circle, also known as knitting in the round. Once you are proficient in the basics of knitting, it is necessary to begin a seamless pattern. This may appear to be daunting, but that is not the case. Knitting in the round is an uncomplicated technique to master. The knitting needles are connected with a cord and the length of the cord required is based upon the number of stitches you are dealing with. If the pattern involves an increasing or decreasing amount of stitches, then you would need to replace the needles with either a shorter or longer cable respectively.

Knitting in the Round on Circular Knitting Needles for Beginners

Knitting in the Round with Circular Needles

Circular needles are meant to do what regular needles cannot do: knit a smooth round tube. Items such as hats, sweaters, socks, and mittens all consist of a circular design. The marvel of knitting in the round is that the tube is created the instant the cast on is complete. The outcome is a seamless tube that can be altered into any design you desire with the assistance of increasing and decreasing.

Circular knitting needles are the most diverse needle type available. For over a century, they have helped knit projects, whether they be round or flat. The majority of knitters who have discovered the comfort of circular needles stick to them permanently. These needles offer ergonomic convenience as the needle tips are joined together with a smooth and flexible cord of various lengths. If the needles are adjustable, then you can modify the cord size accordingly. Even beginners are able to manage knitting with circular needles.

Here are the key points when picking the correct circular knitting needles:

• When knitting in the round, you are always knitting on the front of the work, as there is no need to “turn” the needle to knit on the wrong side.

• The round technique is much faster than knitting flat.

• Knitting in the round yields a seamless tube-like fabric. There are no seams.

Five steps to knitting in the round:

1. Cast on using your preferred method onto the circular needle. As you cast stitches on one needle tip and then spread it over the cord till it gets to the other needle tip.

2. Rotate the cast on stitches so that it faces the same direction to stop the stitches from twisting. Now you need to join the yarn so that it becomes a round. There are many methods to join the round. You can use a simple step such as casting an extra stitch and slipping it to the other needle tip and join the round.

3. Ensure that the yarn is on the left hand needle tip. Add a stitch marker to mark the first stitch of the round. You can use a round stitch marker or if you have forgotten to place one, then use a locking stitch marker.

4. Push the stitches near to the tips of the needles. The rule of knitting in the round with circular needles is the length of the needle should always be smaller than the circumference of the project so that the stitches are not stretched.

5. Use the right needle to knit the first stitch from the left needle and pull tight.

Additional elements to remember when choosing circular knitting needles:

1. Always select a circular needle with a length that is slightly less than the width of your knitting, as this allows the stitches to flow across the needles as you knit.

2. Make sure that the stitches spread around the whole cable and to the right-hand needle tip.

3. Before beginning to knit, double check that the cast-on stitches are not tangled around the cable.

4. When working in the round, there is no need to turn the work over. The right-side will always be visible.

After you’ve had enough practice knitting with a single circular needle, then you can try out working with other methods. The magic loop technique of knitting in the round with circular needles is used for small circumference projects such as baby socks and clothes. As the rule of circular knitting is the needle length should be smaller than the circumference of the project.

Another method is knitting with two circular needles. This technique gives freedom for working on small to large circumference projects. Just make sure that you work with same length and size of circular needles.

If you own a set of interchangeable circular knitting needles, this provides much freedom as it means you do not have to purchase a new set of needles every time you commence a new project. You are able to merge different cables and needles to generate multiple exciting patterns and use the other cables as stitch holders. The needles can also be used for flat patterns, besides knitting in the round.

How to Crochet a Ruffled Scarf?

Want to make your regular scarf a fashion statement? Then a ruffled scarf is just right for you. Crocheting a ruffled scarf is an easy and quick project. It is also a good project for a beginner since it is a great “practice project” with any of your crochet hooks and yarn in your collection.  In this blog, we’ll take you through easy steps to make a ruffled scarf with basic crochet stitches. 

Crochet a Ruffle Scarf

So, let’s get started.

Pattern Design: A pattern is the “map” of your project, so either you choose from your favorite designer or design your own. A scarf generally averages 10-15 inches in width and 60-90 inches in height. It mostly depends on the height of the person and the style they prefer. Also some crochet stitches are better suited to scarves than others. The single crochet (sc) or double crochet (dc) make a close dense fabric that is perfect for cold winters, while the treble stitch (tr) or double treble stitches – often done on lighter-weight yarn – result in an open or more elegant look that mimics lace.

For a ruffled design you can make the flat fabric in dense stitches and the ruffles in open weave. Plan to make ruffles on one side or both. Try and work on a uniform length and width of the ruffles. You can experiment with a shorter scarf. Besides the rectangular structure, you can plan to make a triangular shape with lesser distinct decreases and increases.

Yarn – A scarf can be crocheted with any yarn weight. A normal-length scarf about 250 yards of worsted-weight yarn should be sufficient. But if you are exploring lightweight or chunky weight yarns, then the quantity might differ but you can calculate with a crochet gauge swatch. Leftovers from your stash is also a wonderful option as you can make a rather colorful pattern.

Crochet hook – For your scarf project you can choose single-ended crochet hooks matching your yarn weight. Most patterns and even yarn labels mention the suitable crochet hook size. Tunisian crochet hooks can also be used as long as you don’t attach the interchangeable cord.

Crocheting your Scarf

Step 1: Make a slip knot on your crochet hook. It is not counted as the first stitch. If a pattern counts this slip knot it will be mentioned.

Step 2: Make a chain between 24 and 32 stitches – depending on your gauge. Or, you can start with foundation crochet stitches. This will help you work on the foundation with the stitch itself rather than work on a chain first.

Step 3: Start with any crochet stitch as you have planned for the pattern. Focus on the neat shape and borders or the ruffles will be difficult to make.

Step 4: Once you crocheted a fabric in the length to your liking, then bind off. Using a wool needle, weave in the ends. or, use a locking stitch marker to keep the last stitch secure while you start working on the ruffles.

Add Ruffles

There are two ways to go about crocheting the ruffled. You can either work with the scarf or make the ruffles section separately.

Chain stitches as many as the length of the scarf. This can be around 100+ given the length and the yarn weight.

Row 1 – Work of crochet stitches that are taller than the ones you have worked for the flat section of the scarf. If you have worked with single crochet (SC) stitches, then for ruffles use half double (HDC), double crochet (DC) or even treble crochet (TR).

Row 2 – Work with the same crochet stitches but now increases every 2 or 3 sticthes.

Row 3-5 – Continue with increases.

Row 6 – Fasten off crochet and weave in ends.

Have fun with this project. With Knitter’s Pride crochet hooks and crochet accessories get artsy right away and design your own ruffled crochet scarf.

How to Crochet Dragonfly Stitch?

The Dragonfly Stitch is an interesting crochet stitch pattern.  It is a beginner-friendly lace stitch that adds to the beauty of any simple project with any crochet hook that you own. Though the pattern looks detailed and complex, it can be made with just basic crochet stitches and techniques. Many yarn crafters who are also knitters believe that lace patterns are easy to make in crochet. If you are wondering how to crochet the dragonfly stitch, we’ll walk you through it. In this blog, we’ll see how it’s made but first gather your supplies.

        Crochet hook – You will need a crochet hook, this can be any hook (single-ended or even Afghan/ Tunisian hook but don’t attach the interchangeable cord). Just make sure you are comfortable with it. You can use bamboo, wood, steel, aluminum, or anything. Having the right crochet hook size is most important. If you are following a pattern, you will have all the details. If you are planning your design, you can guestimate with your yarn. Most yarn labels have the information. You can also make a gauge swatch to see if you are getting the look you wanted.


Crochet hook

        Yarn – The yarn for the dragonfly stitch can be anything from your stash or as a pattern instructs. Do not attempt with heavy-weight and light-weight yarn, stick to medium ply so that you can see the stitches easily.

This pattern in US crochet terms is a small swatch of 6 inches.

Before you start, practice the double crochet stitch. To make a DC stitch, yarn over the hook and insert it into the 4th chain. Pull up three loops on the hook. Yarn over and pull yarn through two loops on the hook. Yarn over and pull the loop through. You will have a double crochet stitch on hand.

Step 1 – Make a slip knot on the crochet hook. Start with a chain of 12 plus 3 extra for turning rows for the double crochet (DC) stitch. You can also start with a chainless foundation and get started with a row of double crochet stitches.

Row 1 - Make double crochet stitches in each chain until the end of the row. If you’ve started with a chainless foundation, skip this row.

Row 2 - Chain 3 and double crochet (DC) 5 stitches. Make 1 chain. Do not chain it on a stitch but in the air. Skip 1 stitch and then make double crochet stitches on the other six stitches.

Row 3 – Start with a chain of 3 stitches. Make 2 double crochet (DC) stitches. Chain 3 in the air and then skip 3 stitches. Make 1 double crochet stitch in the space of the chain of the row below. Once again make a chain of 3 stitches in the air and then skip 3 stitches. Finish the row with 3 double crochet stitches.

Row 4 – For this row, chain 3 stitches and make 1 double crochet (DC). Chain 4 stitches in the air and then skip 1 stitch. Make a double crochet stitch on the stitch of the row below. Once again follow the pattern of 4 chain stitches in the air, skip over 1 stitch, and finish off with 2 double crochet (DC) stitches.

Row 5 - Chain 3 and make 1 double crochet stitch (DC). Continue with 4 double crochet stitches in the space formed by the chains of the row below. Make a double crochet stitch 1 above the double crochet of the row below, 4 double crochet in the space formed by the chains of the row below, and 2 double crochet.

Row 6 - Make 1 double crochet in each stitch.

Continue the steps of crochet rows 2 to 6 till you have reached the desired length or the pattern instructs you to.

With these steps, you can easily crochet this fancy lace texture. The Dragonfly looks beautiful in the pattern. The stitch pattern can be easily made into projects such as shawls, scarves, blankets and more. You can also add the swatches to a knitting project and make them all the more special. If you know how to read a pattern chart then you can also plan your own project.

Happy Crocheting!

Best Knitted Gifts for Valentine's

Valentine’s Day is the perfect opportunity to express your love for someone special and what better way to do so than with handmade gifts? Whether you’re a seasoned knitter or just starting out, plenty of knitting projects will show your loved ones how much you care. From sweaters and scarves to mittens and hats, all you need is a pair of knitting needles and some patience to create something beautiful that your special someone will treasure. So why not make this Valentine’s Day extra special with a one-of-a-kind gift crafted with love and care?

Hearts Aflutter Dishcloth

The Hearts Aflutter Dishcloth is a perfect way to show your love and appreciation to someone special this holiday. Make a pattern of small hearts with stranded colorwork or with duplicate stitches. A big heart with knit and purl completed with beautiful edge also looks special. This simple and cute knitting project is both functional and decorative. You can make them with any pair of single-pointed needles or circulars. It will make a great addition to any kitchen, or even a lovely gift for your favorite Valentine. The pattern features an array of beautiful hearts, perfect for expressing your love. Best of all, it’s an easy pattern that won't take too much time or too much yarn. Knit up a batch in red, pink, purple and other shades. This will hardly take a day or the weekend to be done.

Hearts Aflutter Dishcloth

Sweet Socks with Hearts

Knitting a pair of socks is an easy way to show how much you care. And socks are for every season. This Valentine’s Day make a pair of socks. Beginners as well as advanced knitters can knit a pair in days at the most. You can choose to make them as a gift for someone special or keep them all to yourself! Either way, these are sure to bring a smile to the face of your loved one. Get yourself a 2mm or 3mm double-pointed needle or a circular needle in 9-inch or 12-inch lengths. If you are a fan of the magic loop technique then you can knit socks with circular needles of 32 to 40 inches in length. Knitting two socks at a time with two circular needles is an advanced method to complete your task quickly.

Sweet Socks with Hearts

Kisses and Hugs Scarf

Kisses and Hugs are a way to show your love. While you may not be able to give them physically to your loved one all the time, a pattern of kisses and hugs will do it for you. XOXO is the modern lingo for hugs and kisses. Knit this language of love and affection in a scarf and gift your Valentine to be wrapped in love. There are many patterns out there for projects but you can easily plan one too.

Kisses and Hugs Scarf

The double knitting technique will create a fabric that is reversible with Xs on one side and Os on the other side, making a cute combination. If you are fond of colorwork knitting, the Intarsia technique will finish the task smoothly. If you do not have the time and resources just make a simple scarf and then make the X and Os with duplicate stitches. Use a wool needle and a contrasting shade of yarn to make the kisses and hugs stand out.

Cupid's Arrow and Heart Hat

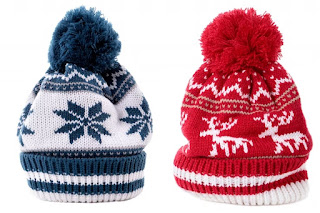
Hats are for every season. For every day or a special day, hearts make for wonderful gifts. Cast on stitches on a circular needle and make a seamless pattern. Double-pointed needles are also perfect for the task as long as you are confident knitting with DPNs and have the right needle length. The design of Cupid’s Arrow and a red heart can be made with duplicated stitches or knit them separately and attach to the hat giving it a beautifully textured look.

Cupid's Arrow and Heart Hat

Be My Valentine Pillow

This one’s for chunky yarn lovers. Knitting a pillow is easy and quick. You simply have to knit two squares or rectangles and stuff them up. Single-pointed needles can be used, or you can go ahead with knitting with your regular circular needles to support the chunky weight of the yarn. The alphabet can be made over knitted fabric or with different types of colorwork. While you can make them with any yarn weight, chunky yarn will give them a plush look and enjoy snuggling into.

Besides the quick-knitted gifts, you can make anything else too. Just make sure to use knitting needles that you are comfortable with and yarn in colors that express your love.

Happy Valentines!


Source: https://knitterspride.gumroad.com/p/best-knitted-gifts-for-valentine-s