Pages

Showing posts with label giveaway. Show all posts

Knitting, Crochet & Pop Culture: Free Pattern Round-Up (+ Giveaway!)

While winter lingers just a bit longer, get cozy and craft your way to spring! In our latest round-up of free pattern inspiration, we spotlight some of the latest pop culture phenomena to inspire clever knit and crochet patterns for crafty fans like you. We also have a special giveaway just for our blog readers this month - keep reading for more details!

Star Wars
The viral popularity of the Baby Yoda character (also called The Child) introduced in last year's The Mandalorian series has crossed over into the world of craft, with knitters and crocheters making their own patterns celebrating this cute addition to the Star Wars Universe. While you wait for season 2 to arrive, try the Baby Yoda knit hat pattern by Shinah Chang or the Wise One crochet beanie by Elizabeth Roggasch to make hats for the little ones in your life. We're also loving all of the cute stuffed toy patterns that are popping up, such as the Baby Yoda knit doll by Kim Konen, the Baby Yoda Amigurumi by LarissaMaced (@beefriendscrochet), and the Baby Yoda Space Pod by Ami Amour.


Superheroes
With a new Wonder Woman movie coming out this summer, there are lots of great knitting and crochet patterns inspired by the Amazon warrior princess. You may remember Carissa Browning's Wonder Woman Wrap,  available in your choice of a Knit or Crochet version, which came out when the first Wonder Woman movie arrived in theaters. But there are plenty more patterns to try, such as the Wonder Woman Amigurumi by Yazmina Nieblas, the Wonder Woman double knit scarf by Konchan le Me, and many more found here!

Another popular superhero in recent years, Captain Marvel, inspired the Higher, Further, Faster Hat by Sara Huntington Burch, Captain Marvel fingerless gloves by Maratini knits, and Taking Flight by Katherine Belisle.

For still more patterns inspired by superheroes, check out We Call Him Spidey Mittens by Kathleen Taylor, the Captain America Baby Beanie & Shield Blanket by The Geeky Hooker, the Batman Wristband by 8-Bit Nerd, or the Black Panther Amigurumi by Yazmina Nieblas. Last but not least, while you wait for the next volume of Guardians of the Galaxy, why not stitch your own Groot Amigurumi by Clare Heesh to keep you company?

Gaming
Pokémon Go is one of the most successful video game apps of all time, and Pokémon Day is February 27 - why not stitch your favorite Pokémon to celebrate? Crochet designer Strings Away has created cute amigurumi versions of several Pokémon - click here to see them all and get started on stitching your very own Pokédex! Featured below are a few of the most well-known Pokémon, Pikachu (by Strings Away) and Snorlax (by Cathrine Johansson). Delight a Pokémon trainer with a Pokéball Knit Hat by Vicki Mann or a crocheted Pokéball Hat by Bonnie Jacobs - you can even knit or crochet a Pokéball so they can catch 'em all!  Click here for even more free knit & crochet patterns inspired by Pokémon!

The Super Mario games - both old and new - have inspired lots of clever patterns such as the Super Mario Mushroom Knitted Toy by Emily Miller, Crocheted Mario Mushroom by Linda Potts, Vickie Howell's Mario Mushroom Mitts, or the Yoshi Amigurumi by Kerstin Brünnler. For more patterns inspired by Super Mario and other Nintendo games, click here!

Giveaway
One lucky blog reader will win a Knitter's Pride prize pack which includes a Large Navy Knitting Chart Keeper, a Reverie Stitch Marker Pouch, and a set of Midnight Beauty Stitch Markers! To enter, just leave a comment on this post telling us about a project you've made (or want to make) that was inspired by your favorite book, movie, video game or other pop culture phenomenon! Be sure to also include your Ravelry ID or email address so that we can contact you if you've won. We'll announce the winner on our next blog post on Friday, February 28. Good luck!

Sticking Your Steeks: How To Cut Your Knitting Without Fear

Steeking is a technique used primarily in colorwork knitting where you knit in the round, adding extra columns of stitches that you can later reinforce and cut open. "Steek" is a Scottish word that is used for the columns of stitches that will later be cut. This technique enables you to knit colorwork patterns in the round without interruption, rather than having to work back and forth on sections to accommodate armholes, necklines and openings for cardigans. 
For instance, if you are interested in knitting a colorwork cardigan, you may choose to knit the garment as a pullover seamlessly in the round, adding a small panel of extra stitches at the front that you will later cut open to create your cardigan fronts.  
Steeking is best accomplished using non-superwash animal fibers that are slightly sticky or fuzzy because they tend to hold together better when you cut them open. While you can steek with superwash yarns, we recommend using something a bit stickier for your first attempt, as superwash yarns are normally fairly smooth. Traditionally, steeked sweaters are knit with Shetland wool (as in Fair Isle sweaters) or in Icelandic wools (as in Nordic sweaters).
If you are contemplating steeking a colorwork project, the best thing you can do to prepare is to create a swatch. Let’s try it!
Supplies:
  • A pattern, specifically a colorwork chart.
  • Appropriate yarn and needles as your pattern requires.
  • A crochet hook that is approximately the same size as your knitting needles.
  • 5-10 yards of sturdy waste yarn.
  • Stitch Markers.
  • A pair of sharp scissors.
Optional:
  • Sewing machine, threaded and ready to go.

Start with creating a swatch of your colorwork design in the round, adding a short vertical panel of 5 stitches where you will be making the cut to your knitting later on. For this swatch to be useful both in terms of testing your gauge and as a steeked swatch (it's always good to make your swatches do double duty!), be sure that you knit a sufficiently-sized swatch to check gauge (click here to read our previous blog post about swatching). For whatever gauge you knit at, we recommend knitting your swatch as a 5” or 6” square. Additionally, a design which has frequent color changes is ideal for your first steek, as denser colorwork holds together the best when cut.   
Step 1: Cast on your chosen number of stitches for your swatch (remember to add 5 extra stitches for your steek panel!). Knit the first row of your swatch in your main color. At the end of Row 1, join your work, being careful not to twist it, and place a stitch marker to mark your beginning of round. When you knit Round 2, place a second stitch marker 5 stitches from the end of your round. Now knit 2-3 more rounds in your main color.
Step 2: Begin knitting from your colorwork chart. You will be working Row 1 of the chart over all of the stitches of your swatch, except for the last 5 stitches of the round (which is now located between your stitch markers). Most often, patterns will have you work 2 colors per row; you should alternate these colors in 1x1 colorwork when you reach the final 5 stitches of the round (which we'll refer to as the steek panel). 
For instance, if you are working with colors A and B, you can knit the 5-stitch panel in A-B-A-B-A. On the next round, if you are using the same colors, you should reverse the colors, so you knit B-A-B-A-B.  If you are using different colors in the next round, just alternate those colors in the 5-stitch panel. When you finish using any color, you can cut that color, leaving a 5-6” tail.  
At the end of your swatch, knit 2-4 rounds in your main color and then bind off loosely.
Step 3: Once you have created your swatch, the next step in steeking is to reinforce the edges where you wish to cut. There are two primary methods you can use for this: sewn reinforcement and crochet reinforcement. If you are comfortable machine sewing your knitting, run a single or double line of stitching vertically along the outer edges of where you will be cutting. We recommend running these lines through the 2nd and 4th column of stitches of your 5-stitch steek.  
If you are not comfortable with the sewing machine method, you can use a crochet hook and crochet around the 2nd and 4th column of stitches holding your knit stitches into place, as shown below. For additional photos and a tutorial on how to do a crochet reinforcement, you may wish to consult Kate Davies’ excellent tutorial on her website, Reinforcing and Cutting.
Step 4: Once you have reinforced the edges, it is time to cut your knitting!  For this you will want to use a pair of sharp scissors. You will also want to pick a vertical line in the center of your steeking panel, the 3rd stitch, and cut through your knitting at the same point in each row.
At this point you made your first steek! What follows are additional suggestions for finishing a steeked edge garments or other finished knits.  You may wish to practice these techniques on your swatch, but if not, you can now wash and block your swatch to check for gauge and get ready to start your project.
Additional Steps: After you have cut open your knitting, you will need to begin your finishing work.  From the outer edges of your reinforcement line, pick up for your button bands and knit them as written in the pattern. Or, in the case of sleeves, you may pick up the stitches and knit your sleeve down to the cuff; alternatively, you could knit the sleeves separately and sew them in.  
There are many methods for finishing the inside of your garment where the steeked edges are. You may wish to knit a folded button band. If you do this you can tack down the inside portion of the folded button band over the steeked edge, trapping it inside the buttonband, out of sight. 
If your button band is not folded, you may wish to purchase some ribbon to line the inside of your button bands. This will both stabilize your button bands, as well as cover the steeked edge. Again, if you are comfortable using a sewing machine on your knits, you can attach the ribbon to the button band using your machine. If you are not, you can tack the ribbon down and hand sew the edges to the button band, covering up the steeked edge. 
Whether or not you hide the steeked edge, after a few washes the edges should felt a bit and become even more secure.
If you are interested in more information on steeking, you may wish to read:


Giveaway
It's been a while since we hosted a giveaway here on our blog! We're giving 1 lucky reader a chance to win this Pattern Chart Keeper and Blush Needle and Crochet Gauge with Yarn Cutter from our 2017-18 Collection! To enter, simply leave a comment on this blog post telling us if you've ever given seeking a try (and how it went if you did!). Be sure to also mention your Ravelry ID or email address so that we can contact you if you win. We'll randomly select a winner to announce on our next blog post in March. Good luck!

Like this post? Pin it!

Free Patterns: Recipe for Relaxation Knit & Crochet Mason Jar Cozy + Free Printable Gift Tags

The holiday season is in full swing! Today, we have two free patterns for a quick gift you can whip up in just a few hours. These mason jar cozies are a fun and festive way to package a thoughtful gift, and mason jars can hold so many things: colorful candies, hot chocolate or baking ingredients, or relaxing bath salts (we share our favorite recipe below!). Whether you knit or crochet, we've got you covered with this simple pattern using a bulky weight yarn. Enjoy!


Recipe for Relaxation: Relaxing Bath Salts
Depending on the size of your jar, you will need to double, triple, or quadruple this base recipe. You'll need 1/2 c. Epsom salts (found at most grocery or drug stores), 1/2 c. baking soda, and 10-20 drops of your favorite essential oil. Some popular choices include lavender (relaxing), rose absolute (relieves anxiety), bergamot (uplifting), eucalyptus (great for cold & flu season), or tangerine (calming). Mix everything together in a clean bowl and transfer to your mason jar.

Crochet Mason Jar Cozy

Supplies: 

Gauge: 11 stitches and 16 rounds = 4" in single crochet

Finished Dimensions: To fit 3" circumference jar (see pattern notes for how to adjust for other sizes); 3.5" height

Abbreviations: 
sc - single crochet
dc - double crochet
rnd(s) - round(s)

To Make Cozy:

Begin with a magic ring - sc 6 stitches. Use removable stitch marker to mark the beginning of each round as you work; you will be working in a continuous spiral unless otherwise noted. 

Increase Rnd 1: sc twice in each stitch. 12 stitches. 
Increase Rnd 2: *sc 1 stitch, sc twice in next stitch, repeat from * to end of round. 18 stitches.
Increase Rnd 3: *sc 2 stitches, sc twice in next stitch, repeat from * to end of round. 24 stitches.
Increase Rnd 4: *sc 3 stitches, sc twice in next stitch, repeat from * to end of round. 30 stitches.

Note: You can adjust final circumference by working fewer increase rounds (for a smaller jar) or working additional increase rounds (for a larger jar). For a larger cozy, simply add 1 more sc stitch between increases. 

Work turning rnd: sc all stitches through the back loop only. When you reach the end of the round, slip stitch in the first stitch at the beginning of that round. Chain 1 stitch.

For next 2 rnds, sc all stitches. When you reach the end of the second round, slip stitch in the first stitch at the beginning of that round. Chain 3 stitches.

Next rnd: Skip first stitch of rnd, *DC in next stitch, skip next stitch and chain 1, repeat from * to end of rnd. When you reach the end of the round, slip stitch in the first stitch at the beginning of that round to close. Chain 1 stitch.

Single crochet all stitches until you reach desired height (sample shown measures 3.5 inches from turning rnd). When you reach the end of the final round, slip stitch in the first stitch at the beginning of that round. Break yarn and pull through loop to secure. Weave in ends. 

Knit Mason Jar Cozy

Supplies: 

Gauge: 16 stitches and 18 rounds = 4" in stockinette stitch

Finished Dimensions: To fit 3" circumference jar (see pattern notes for how to adjust for other sizes); 4" height

Abbreviations: 
k - knit
kf&b - knit into front and back on 1 stitch (1 stitch increased)
k2tog - knit 2 stitches together (1 stitch decreased)
p - purl
yo - yarn over

To Make Cozy:

Cast on 6 stitches. Use removable stitch marker to mark the beginning of each round as you work; you will be working in a continuous spiral. 

Increase Rnd 1: kf&b 12 stitches. 
Increase Rnd 2: *k1, kf&b, repeat from * to end of round. 18 stitches.
Increase Rnd 3: *k2, kf&b, repeat from * to end of round. 24 stitches.
Increase Rnd 4: *k3, kf&b, repeat from * to end of round. 30 stitches.
Increase Rnd 5: *k4, kf&b, repeat from * to end of round. 36 stitches.

Note: You can adjust final circumference by working fewer increase rounds (for a smaller jar) or working additional increase rounds (for a larger jar). For a larger cozy, simply add 1 more knit stitch between increases. 

Work turning rnd: p all stitches. 

Work 3 rnds in stockinette stitch (k all stitches).

Eyelet rnd: *yo, k2tog, repeat from * to end of round.

Work in stockinette stitch (k all stitches) until you are approximately 1/2" from desired height from turning rnd (sample shown measures 3.5 inches from turning rnd).

P 1 rnd.
K 1 rnd.
P 1 rnd. 

Bind off all stitches knitwise. Break yarn and pull through loop to secure. Weave in ends.


Since it's the season of giving, we have two more bonuses for you this month!


Like this post? Pin it!


Better Buttonholes for Knitted Garments

Do you avoid making worked-in buttonholes by knitting only pullovers or zip-up cardigans? Buttonholes give many knitters pause, as they are a feature usually located on the front a garment: you want them to look their best and be done well. In this post, we aim to provide you with the information you need to build a better buttonhole!

Small Eyelet Buttonholes

Knitted buttonholes are best kept as small as possible as a knitted fabric will stretch to allow the button to pass through. There is no one formula to follow, so you can be flexible in your choice, keeping in mind the garment style, yarn used, and the size of the button.


Traditionally used on baby garments, the small eyelet buttonhole is appropriate anytime a small button is used. The eyelet makes a round opening so a button somewhat larger than the opening is required to stay in place. The technique involves a combination of a paired yarnover and decrease (for example, yo, ssk), similar to what you use in lace and mesh patterns.


If you need a slightly bigger buttonhole, try working a double yarnover by wrapping the yarn around the needle twice, and working an additional decrease to compensate (for example, k2tog, double yo, ssk). When you come to this double yarnover on the next working row, you will work k1, p1 (or p1, k1) into those stitches.


If you still need a much larger buttonhole, Ysolda Teague has an interesting technique she calls the One Row Buttonhole, which is an excellent choice to use when an eyelet buttonhole is not appropriate.

Reinforcing a Buttonhole


If a buttonhole is going to be subjected to hard wear, the yarn used for the garment is softly spun, or if the fabric is worked at a loose tension, the smart choice is the reinforce the buttonhole. Reinforcing the buttonhole will also stabilize the opening to avoid stretching out with wear. On occasion, a sewn finish can be used to camouflage an imperfect buttonhole, to correct one that is too large or stretched, or to add a decorative touch. Using the same yarn used for the garment will help the edge blend in.


The choice of stitch to reinforce a buttonhole is up to the knitter or crocheter. Shown above left is the buttonhole swatch before any reinforcement was completed. The buttonholes in the center are reinforced with (from top to bottom) an overcast stitch in a contrasting yarn, overcast stitch in with a ply of the yarn used,  buttonhole stitch with a ply of the yarn used to knit the swatch, and the buttonhole stitch worked with a contrasting color. The top right photo shows a close up on the first two methods, the bottom right photo shows the second two methods.


Purchasing your buttons at the start of the project will help guide your choice of buttonhole to make! Before you cast on your project, take your swatch (you did make that swatch, right?) to the shop so you can see how the buttons look with your fabric.


Giveaway


One lucky blog reader will win a large Joy Hand Block Printed Fabric Bag. To enter, leave a comment on this post telling us what you’re knitting or crocheting this fall. Be sure to also mention your Ravelry ID or email address so that we can contact you if you win. We’ll randomly select one lucky winner to announce on our next blog post on Friday, November 10. Good luck!

Like this post? Pin it!


Cloud Peak KAL + Designer Spotlight: Simone Kereit of OwlCat Designs

Fall is just around the corner, and we're celebrating summer's last hurrah with a fun KAL featuring a new design by Simone Kereit of OwlCat Designs! We've asked Simone to share a guest post with our readers - read on for more info about this KAL, a special coupon code just for Knitter's Pride fans, and a chance to win the special prize, too!

Hello there, my lovely knitting friends! 
I am Simone Kereit, but you may know me better as OwlCat Designs, and we’ll be doing a fun KAL together! And before anything else, I want to thank Knitters Pride for sponsoring this event and letting me take over their blog as well as providing a number of cool prizes to participants, but more on that later!
But before we get into any more details, let me introduce myself a little, in case you don’t know that much about me:
My name is Simone and I was born in Switzerland where I learned to knit when I was around 5 or 6 years old. My mom always had a project going, so the concept was with me from a really young age. And then of course, we all learned to knit in school, though I am sure my brother would not remember how if I asked him these days! When I started to knit, there were not a lot of patterns, especially for kids or teenagers, and so I learned to knit socks by asking my Mom how to do it, and knitting a sweater by picking out yarn which at the time would have convenient notes on the label about how many balls of yarn it might take for a size 38 etc. You would then take the yarn home and swatch the stitch you wanted to use and then doing all the math off of the swatch. As you can imagine, there was  a bit of a learning curve and not all my projects turned out fabulous right from the start. I distinctly remember one where I decided to put a band of colorwork into the bottom third on the front and since this was the first time I worked a stranded design and was teaching myself by making ALL the mistakes, the band was a whole lot tighter than the rest of the sweater. So smartly, when I knit the back, I made sure to make it extra loose, which ended up making a big ol’ pouch than hung below my butt! I still wore the sweater, I had made it after all, but luckily it was a really warm number and there wasn’t all that much occasion to wear it except in the woods!
When I moved to the US in 1999, I was surprised to learn that not everyone was knitting the way I was taught and publishing designs was almost the logical conclusion.
I really love to knit and so I enjoy a variety of techniques and items, from shawls over smaller accessories (like the Mitts we will be knitting together) to sweaters and cardigans. I design things that I would like to wear (and I often do, though sometimes I have to wait for the shawl or sweater to make their way back to me after travelling in trunk shows to shops around the country) and so the things I am inspired to design change. I have many more ideas than hours or energy in my hands to knit, so I have to structure and plan, but I do like to leave a bit of room for the unexpected, if I can. I find having the freedom to design something on the spur of the moment just because I had this amazing idea really helps my creativity and my happiness. 

I love wooden tools, knitting needles included and have more needles than I care to admit. I probably have the entire size range of Knitter’s Pride Dreamz Interchangeable needles twice over, because they give me so much flexibility and because I always seem to need needles in the same sizes and end up adding another set of tips. I love that the wooden tips now come as Natural, because sometimes you just need a light colored needle to be able to really see your stitches. When I knit small circular things I prefer using DPNs, but I do quickly go over how to adapt your longer (40” /100 cm) circulars to knit these mitts using magic loop. 

One thing that I think absolutely rocks about the Knitter’s Pride interchangeable needles is the end caps. Do you use them much? If not, you should! Each cable comes with two of them and even though I tend to not often put something aside on the cable to use the needle tips for something else (see above and my mention of my needle collection) though they are great for that as well (just make sure to use the size tags which come with each set, for you won’t remember the size when you find your project 2 years from now and the sticky notes do fall off, trust me).
No, what I use them most often for is travel safety and sleeve stitches. 
Let me explain the first: When you travel on planes these days, you never know if they might take your needles. Fingers crossed, I never had an issue using my wooden Dreamz tips, but it depends on the country and the airport and you just never know. If you should be so unlucky as to have to give up your needles, simply unscrew the tips, put endcaps on and when you get to your destination, unpack the set of tips that was in your checked luggage! Sure it is sad that you couldn’t knit on your lace shawl while flying, but the stitches are safe and you get to enjoy it when you are on vacation! 
The other is sleeves: When I knit cardigans or sweaters in the round, (anything circular yoke or raglan shaped) instead of putting stitches on waste yarn, I simply knit them onto a short cable, add endcaps and voilà! When it comes time to knit the sleeves (or join the sleeves to the body for bottom up designs) all you have to do is unscrew the endcaps and thread on the proper needle. No more stitches that got all tiny and are hard to pick up, no slipping this way and that. Just screw on those tips, and knit right off the end! I am probably a bit giddy, but I do love this so much, I probably have 8 sets of 16” and 20” cables just for that!
But let’s get back to designing. Often my inspiration comes from nature, I love hiking and being outside in general and anything in nature from a misty sunrise to an intricately twisted branch can just hit you and take your breath away. The Cloud Peak mitts that we are going to knit together, were inspired by those high peaks up in the mountains, the ones that often wear a cap of clouds when the wind is right. I settled on the name on our recent vacation, when driving across Wyoming towards the Big Horn mountains, the tallest peaks are in an area known as the Cloud Peak Wilderness, and from a distance, there are many smaller peaks visible as you approach across the lower country. The name seemed just perfectly fitted to the stitch pattern reminding me of mountain ranges back home with multiple peaks jutting high into the blue sky.
I hope many of you will join me as we get started, the official cast on date is August 25th, so you have 2 full weeks to shop for the perfect yarn or dig through your stash for that perfect skein. You need sport weight yarn and if you like, beads. I have tutorials that will show you all the parts that might be new to you, so if you’ve never used beads in your knitting, just follow along, it’s super easy! And all the details on materials are below. 

The socializing part of the KAL will be happening online and we even have our very own #hashtag: #CloudPeakKAL 
We will virtually knit together in my Ravelry group and on Instagram 
And on the Knitter's Pride and OwlCatDesigns Instagram profiles.  

So come over, give us a follow and say hi in my Ravelry group!


When I started designing these mitts, I wanted them to be versatile, but also something that has a few details that perhaps are new to you and where you can add a new knitting skill to your bag of tricks. I designed them to be knit in Sport Weight yarn so it would go quickly and the beads add an elegant little detail to the back of your hand! The pattern comes in a couple of sizes and I want to quickly go over how to measure your hand to find the perfect size and fit. 


As shown in the picture, measure the circumference of your palm, holding the tape measure snug. On the pattern you will find two measurements, one is the actual finished size, the other is the hand circumference it is meant to fit. Just like when you make a hat, you will want some negative ease (the actual measurement of the knitted item is smaller than the size of your hand) as knitted fabric has some stretch. This is so the mitt doesn’t fit all floppy and loose in the end but fits you ‘like a glove’.
The Cloud Peak Mitts can be knit with a regular or a long cuff, since I like mine long to tuck into a sweater or inside a jacket sleeve without cold wind getting to you. And the pattern is written in multiple sizes, so you can make one for the rest of the family too! As we go along, I have a couple of hacks and adaptations that I think would make these fun for a guy to wear as well (unless of course they are fond of beads, no tweaking necessary then).
A quick word on yarn: For this stitch pattern, a smooth plied yarn works best, and since mitts usually get a good bit of use and friction, you may want to opt for Superwash while you’re at it.
Ok so now that you know a bit more, here is what you need to get to be ready for cast on!
Pattern
Yarn
Approx. 155 (165, 180) yds / 140 (150, 165) m of sport weight yarn
Needles
US 4 (3.5mm needles) Knitter’s Pride either DPNs or 40” / 100 cm circulars needles for magic loop
Gauge
28 st and 32 rows = 4” / 10 cm in stockinette st
Finished Sizes
6 (7, 8)” / 15 (18, 20) cm palm circumference
to fit hand with palm circumference up to 7 (8, 9)” / 18 (20.5, 23) cm
Notions
Tapestry Needle
0.75mm Knitter’s Pride crochet hook or preferred tool to add beads
approx. 95 (105, 120) size 6/0 beads
5 markers (2 color A for Cloud Peak pattern panel, 2 color B for thumb gusset, and 1 marker for EoR)


For the sample I used Dragonfly Fibers Damsel in Silver Fox and less than 1 tube (20g) of size 6/0 beads in matte metallic silver grey.

Our KAL runs August 25-Sept. 22; I hope you will join me as we knit the Cloud Peak Mitts together over the next few weeks! 

August Giveaway! 

One lucky reader will win a Deluxe Royale Interchangeable Needle Set. To enter, leave a comment telling us what your favorite pattern is from Simone's back catalog! Don't forget to also mention your Ravelry ID or email address so that we can contact you if you win.

We'll randomly select one lucky winner to announce on our next blog post on Friday, August 31. Good luck! 

Keep it Green by Upcycling for Earth Day + Giveaway

Do you want to help keep as much as you can out of the landfill? Do you hate to see things going to waste? Here are a few tips to help upcycle materials this spring!


Unravel a sweater to reclaim yarn
We all have those sweaters in our closet that are destined to go to the thrift store after the Spring cleaning purge, but what if that sweater could become your next new project?


Start by examining the sweater, if it is still in good condition, you can reclaim the yarn. Start by unseaming the sweater. Once the sweater is in parts, find an end and start unraveling! This can be a fun project to do with kids. Using a swift makes the process go a little faster, and prepares you for the next step. Wash the yarn in a yarn soak to relax the fiber, then hang it up to dry with a weight to get out any of the pesky kinks.


If you don’t like the original color of the yarn, this is the ideal time to dye it.


If you don’t have any old sweaters, head to your local thrift store and there are sure to be plenty of them there to turn into a pretty sizeable stash. For a more detailed explanation of this process, check out this great blog post.


Turn fabric into yarn
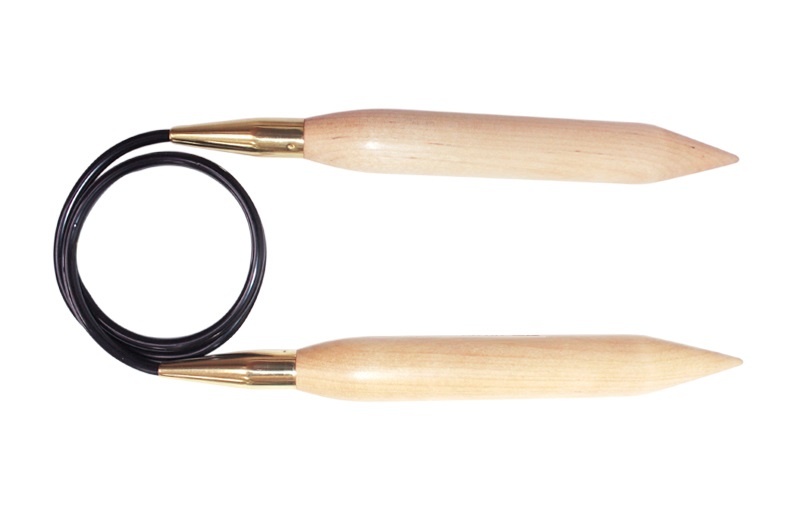
Whether it’s a worn out t-shirt, or old sheets, any fabric can become your new rug yarn! Cut up t-shirts and sheets to create long strips of fabric that you can either crochet, knit, or weave long-lasting durable rugs. This gives those old garments a second life, and gives you an excuse to use your Jumbo Birch needles and hooks!


Crochet Rug Tutorial from 1 Dog Woof


Upcycle your worn-out clothes
If you have a t-shirt that is a little worn out or just don't love it anymore, adorn it with yarn!


The Jelly Bean Tee Edging pattern teaches you how to add a knit yoke around a shirt, which can add new life to your favorite sweatshirt! Or, try adding some lace around the worn out cuff of your jeans.


Spruce up your boring outfits by adding appliques, as seen here in the Sweater Makeover pattern from Meredith Crawford.

Giveaway
What is your favorite upcycling tip? How do you celebrate Earth day? Let us know in the comments below for your chance to win 1 of two prizes: a set of our Naturalz DPNs or a pair of our Fixed Circular Needles. 

We'll announce our winners in our next blog post on Friday, April 28. Good luck!

If you liked this blog, please share it with your friends and knit group! If you try any of these projects, let us know over on Instagram and use the hashtag #knitterspride.