Pages

Showing posts with label contest winner. Show all posts

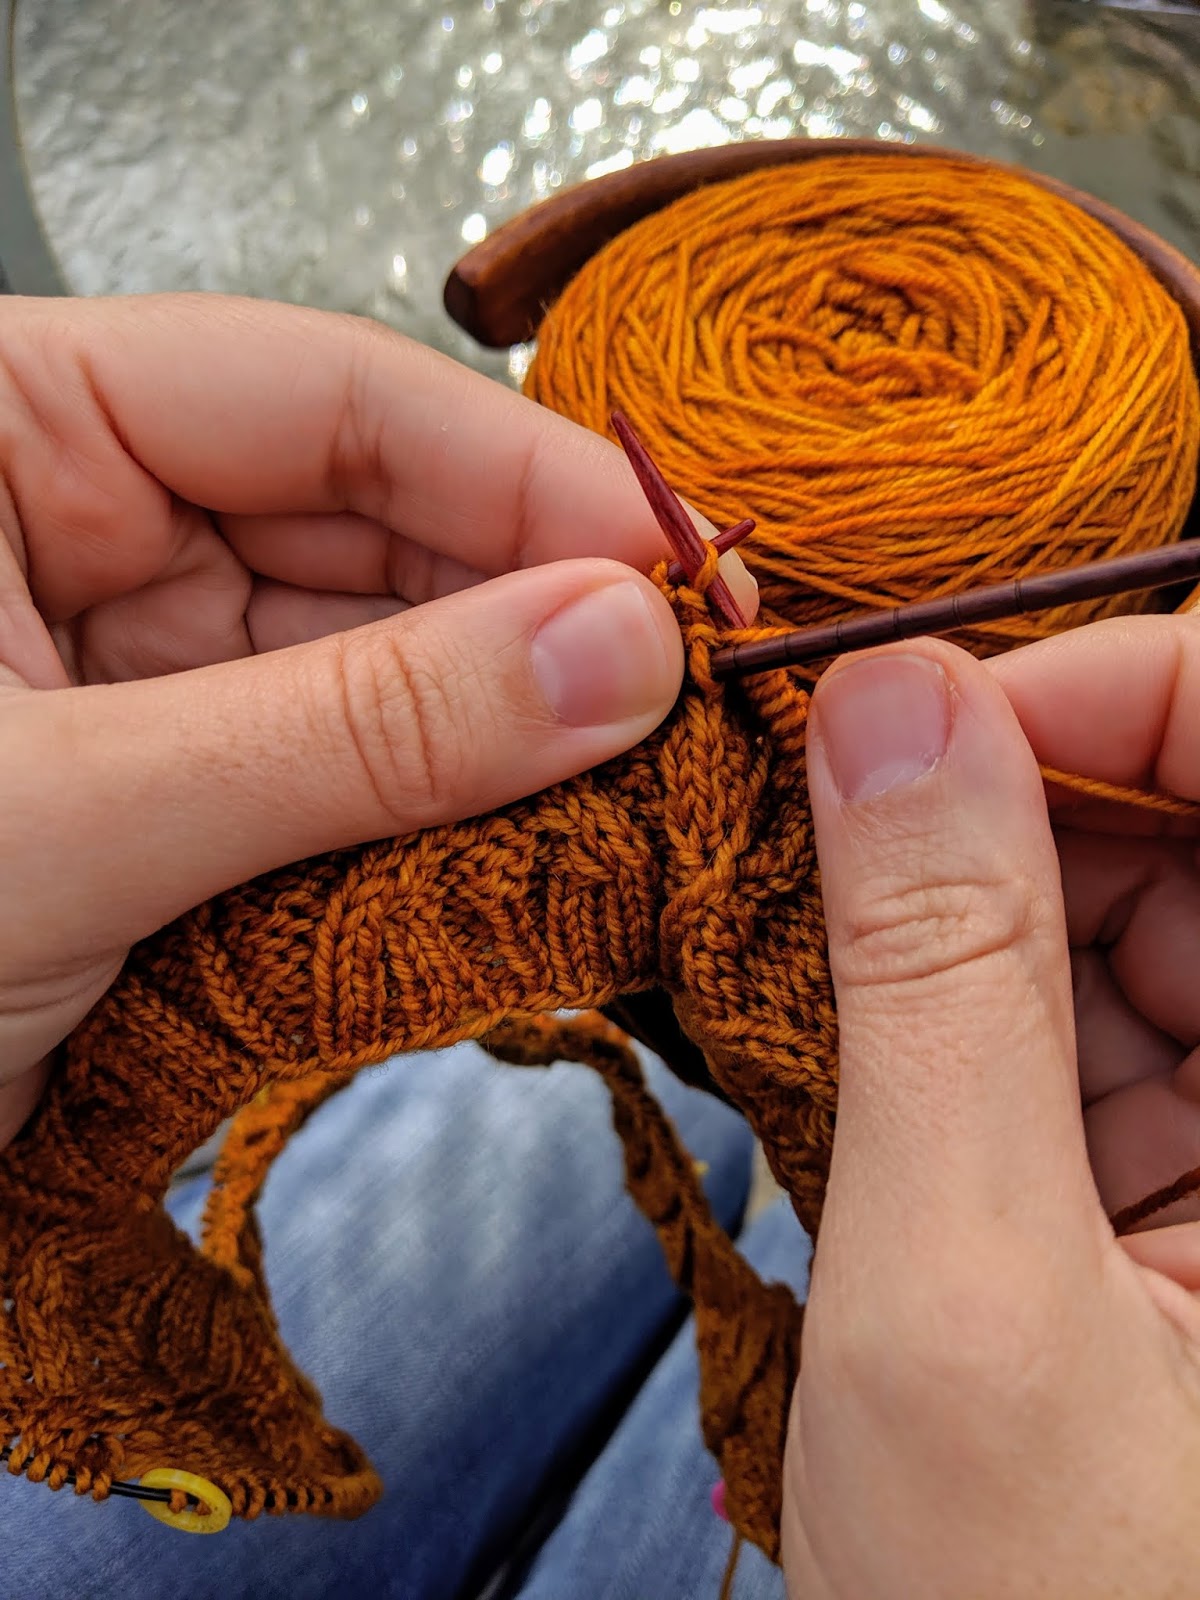
2019 Fall Photo Contest Winners

Thank you to everyone who submitted a photo to our fall photo contest! We enjoyed seeing what everyone is making with their favorite Knitter's Pride needles, hooks and accessories.

We are pleased to share the winning photos which were randomly selected to win the following prizes:


Grand Prize: - C.S. has won a SmartStix Deluxe Interchangeable Set for sharing this photo of their Zing DPNs in action!

Amanda W.'s hat WIP on Royale fixed circulars.

Samantha A.'s autumn cables

Runners-Up: Amanda W. and Samantha A. will receive a SmartStix fixed circular or DPN needle in the size of their choosing.

We will contact all winners via email to arrange for the delivery of their prizes. Don't forget to keep sharing your photos of your fave Knitter's Pride products in action here on Ravelry or on Instagram using the #knitterspride hashtag for your chance to be featured!

Winner + Lots of LYS Love!

Last month, we asked you to share why you love your LYS, and we received some fabulous entries for our contest!  Below are a few of our favorite posts from the Ravelry contest thread. Be sure to keep reading until end to find out who won our grand prize!

Puffygriffinclaw has this to say about her LYS:
My favorite LYS is The Village Yarn & Fiber Shop in East Rochester, NY. They have a remarkable array of yarns, from work horse yarns to those very special yarns. The staff is always helpful, and they offer many types of programs and classes as well as knit nights. They also sponsor special events for charity as well as trunk shows. They are active supporters of the local fiber community, so hats off to them!

They stock Knitters Pride needles, and I hope they will soon stock the Zings that have stolen my knitting heart!


LunariaLovesTea has two shops she frequents in two different states:
"I’m really lucky to have my LYS be WEBS in Northampton, MA. I’ve spent many hours wandering through the vast store and taking classes. My LYS away from home , when I visit my son in Denver, is Fancy Tiger Crafts. They carry wonderful yarns that I can’t get at home, so I always participate in yarn tourism!"

spundreams appreciates the community at her LYS:
"My LYS is The Yarn Store at Nob Hill in Albuquerque, New Mexico. I love them not only for their excellent selection of just about every aspect of fiber craft, but also because the owner has done her best to make it a community center. Aside from the coffee maker, microwave, and refrigerator, there are often munchies available, supplied by the store as well as brought in by customers. There are some excellent classes as well as various crochet-, knit- and spin-alongs, plus open knitting (Or crocheting or spinning, etc) any time the store is open. There is a computer available to look up things on Ravelry or to find patterns or yarns. There are also experts on hand who can help with simple problems or questions for free, and help with more complex problems at a reasonable price. There are arranged trips to various fiber shows; and in-store there are guest lectures and trunk shows. As part of the community outreach the owner recently invited the candidates for the local mayoral race to come after hours for a meet-and-greet and to explain their positions and answer questions. Any one of these things would be enough to make it an excellent yarn store, but everything put together truly makes it a treasure for the fiber arts as well as the larger community."

Though we couldn't pick all of the lovely messages, you can read them all in our Ravelry thread.

Last but not least, our randomly-drawn grand prize winner is post #18, crazy8mom with this entry:
"My LYS is the Tangled Skein in Eagle River, Alaska. It is a beautiful, well stocked shop that has a wonderful selection of yarns of all types. They have the largest selection of needles available in our state. So many cute accessories are available to tempt! And they are always free to help with knitting problems."


We will contact our winner on Ravelry to arrange for the delivery of your prize. Thanks to everyone who entered our contest, we hope you'll continue to show your LYS some love this fall!

ETA: Oops, we forgot to announce the winner for our August giveaway! We apologize for the delayed announcement, our randomly-selected winner is Cazzie53. We will contact you on Ravelry to arranger the delivery of your prize, a deluxe Royale interchangeable set! 

Winner + Free Crochet Mitts Pattern

Congratulations to Raveler mmmgood304, who won this month's giveaway for a Chunky Mesh Wrist Warmers kit! We'll be in touch with you shortly to arrange for the delivery of your prize.

Our previous blog post featured a free pattern to knit a quick pair of mitts using our Jumbo Birch needles and two skeins of Briggs & Little Super Yarn, and we promised a freebie for our fans who crochet in this week's blog post. These simple mitts are very easy to customize for a variety of hand sizes and stitch up ultra-quickly using just 1 skein of Briggs & Little Super Yarn and a Jumbo Birch crochet hook.

Enjoy!

Quick Crochet Wrist Warmers

by Stefanie Goodwin-Ritter

Supplies:
Gauge: 5 sts and 4 rows = 4 inches in single crochet, blocked

Finished Dimensions: 7" circumference, 7" length (allow approx. 1" negative ease; see instructions below for how to customize your fit)

About this pattern: A bulky weight yarn is worked with a larger hook size to product a mesh-like single crochet fabric. What makes this yarn special is the story: Bricggs & Little is Canada's oldest woolen mill and produces premium yarns spun from 100% domestic wool, and is milled, carded, dyed, and spun at their factory in York Mills, New Brunswick, Canada.

The finished mitts will be very stretchy, so be sure to knit the size that is approximately an inch smaller than your desired hand circumference. Don't be alarmed by the size and shape of your project while it is being knit - the magic is in the blocking!

Mitts (Make 2):
Ch 9 and work single crochet in 8 sts, beginning with second ch from hook.

Single crochet all rows until piece measures 6 inches from start. For your final row worked once you have achieved your intended length, slip stitch in final stitch, snip your yarn end leaving several inches for seaming, and pull through to secure yarn end.

How to get a custom fit: If you would like to create mitts with a larger or smaller circumference, you can add or subtract rows here - just be sure to take into account the notes above regarding negative ease and gauge when blocked.


With wool needle or tapestry needle, seam five inches of cast on and bound off edge together; leave the next 1.5 inches unseamed for thumb; tack the opposite edge together for top of mitt.


Wash your mitts in your favorite wool wash and lay flat to dry on Knitter's Pride Blocking Mats. To achieve stated dimensions and neat edges, use Knitter's Pride Knit Blockers as directed in our previous blog post, found here.


Wear & enjoy!

Winner + Knit & Crochet for Charity: Where to Donate

Congratulations to LisaTknits, our first prize winner for the Spring KAL with Angela Tong that's happening now here in our Ravelry group! We will get in touch with you to arrange for the delivery of your prize, a Marblz DPN Set. Click here to learn more about our KAL on our previous blog post! 
Our Spring KAL is a great opportunity to knit items to donate to charity, especially if you're making the newly-released Hishigata Hat by Angela Tong! Knit in a bulky weight yarn with a pretty diamond cable pattern, this hat is a fun, fast project that can be donated to those in need.
The Hishigata Hat by Angela Tong
Of course, you don't have to limit your donation to projects made in our KAL, or just hats - there are plenty of organizations that are looking for hats, scarves, and other items year-round! Today, we'd like to spotlight a few of these organizations where you can donate your finished objects (FOs), though this is by no means a complete list! If you happen to knit or crochet for a particular organization that isn't listed here, we would love to hear about it in the comments! 

This project was launched last year to collect knitted and crocheted hats (or tuques, as they are known in Canada) for Syrian refugees arriving in Canada. Initially begun as a small group in Quebec, the project quickly spread throughout the country and even into the US with Purlescence Yarns in Sunnyvale, CA serving as a donation collection point for American crafters. While the project is focused mainly on hats, other donations of mittens and scarves are also accepted if they have a matching hat along with them.

This not-for-profit organization accepts knitted, crocheted or sewn caps for chemo patients which are distributed to over 450 cancer centers each month. They provide a set of guidelines for your handmade donation here on their website, as well as free and for sale hat patterns for knitters and crocheters. 

This organization accepts donations of sweaters, caps and blankets to distribute to children living in poverty worldwide. They prefer items which are knit with easy-care acrylic yarns and provide free patterns for making your donations. Donors can also use a pattern of their own choosing if they prefer.

This organization accepts donations of knitted and crocheted blankets and other accessories year-round; you can check their Current Needs section of the website to see which items they are currently looking for. 

VK Live Winner, Very Pink Knits Tutorial + Knit Blockers Giveaway!

Happy New Year! There's no better way to start things off than with a little inspiration. Deborah B. will be getting quite a bit of inspiration as our winner for the 3-Day Marketplace Pass for this month's Vogue Knitting Live Event in New York City - we'll contact you via Ravelry to arrange for the delivery of your prize!

For those of you who can't make it to the event, please enjoy the latest tutorial videos from VeryPink.com! This first one features our Marblz needles, and host Staci Perry covers everything you ever wanted to know about twisted stitches: when they're good, when they're bad, and how to correct a twisted stitch.


Earlier this week, Staci shared a brand-new video demonstrating how to make a provisional cast-on using our Dreamz crochet hooks and needles.


If you missed the first videos from this series which we've sponsored, click here for a free shadow stitch tutorial and here for a free Modern Tunisian Quilt pattern that's great for beginners.

Giveaway!

This month, one of our lucky blog readers will win their own set of our popular Knit Blockers! To be eligible, simply leave a comment on this blog post telling us what your crafty resolution is for 2016 - be sure to also mention your Ravelry ID or email address so that we can contact you if you win.

We'll randomly select one winning comment to announce on our next blog post on Friday, January 22. Good luck! 

Winner + Designer Interview: Anna Hrachovec of MochiMochi Land

Congratulations to globalite, who is this month's blog winner! We'll get in touch with you to arrange for the delivery of your prize, a copy of Adventures in MochiMochi Land and a Nova Platina Cubics DPN Set!


Today, we have an extra-special interview with a designer whose work has been exhibited internationally: Anna Hrachovec of MochiMochi Land! You may recall Project Gnome Diplomacy from earlier this year, which culminated in an art installation in South Korea. Anna's work was also recently on display at Vogue Knitting Live Chicago, an event we were proud to sponsor. We hope you'll get to know Anna just a little bit better in today's interview. Enjoy! 

Some of the first-ever Mochis
How long have you been knitting, and how did you get started designing toys?
I started knitting when I was 18, so it’s been a good 15 years now. I began designing toys on a whim, when I wanted to make something fun as gifts for my friends—I was a little bored of knitting things to wear and washcloths and so forth, and wanted to create something more unique. My first designs were simple toys that I knitted flat and stitched together, and they were actually in the shape of the logo of the gallery that I worked at at the time. I was so in love with these creatures that right away I knew I wanted to design lots more toys. This was in 2007, and basically I just haven’t stopped knitting toys since. Early on I started a blog, and maybe because there weren’t a lot of patterns for knitted toys at that time, people took notice pretty quickly, and after a while I figured out that I could make a job for myself out of designing. 

Where do you get inspiration? 
My inspirations have come from all kinds of sources, but more and more I like to think of my designs as existing in their own world together, so I’m often thinking about landscapes and environments and also relationships between things, conflicts and cooperation. So I get a lot of ideas from our own world, and also from things like Japanese design and classic cartoons. 


How did you get involved with Nickelodeon?
The creative director for their on-air promotions had seen some of my creatures at gallery hanahou (the NYC gallery that I had worked at and that inspired my first toys), and after expressing interest in working together for several years, he finally made that happen via my agent in 2013. I had actually just moved to Chicago when that happened, so one of the first things I did when I got to Chicago was go back to NYC to work on those animations, which made the whole thing extra surreal. 

Gnome Genome project at the Everyday Moonday gallery in Seoul

We loved Project Gnome Diplomacy earlier this year. How did the exhibit go? Can you share any photos or stories? 
Thank you! It was such a fun project to just ask people to send me gnomes that they’d made and get all kinds of surprises in the mail. (I got 333 gnomes in the end!) The show at Everyday Moonday gallery in Seoul went really well—it was a big task to set it all up (we basically spent a whole week in the gallery), but the response from the people who came to see it was really warm, and I heard that lots of people brought kids to see it during the month that it was on display. 


The gnome diplomats are currently being distributed to people in Seoul via the gallery’s cafe (shown above)—each one has a little note with it saying something like “take me to your favorite place!” or “give me to the first person you meet!” I love to think about the care that the knitters and crocheters put into making these little guys and the way that they’re being given to strangers on the other side of the world just for the sake of spreading fun and little surprises.

Gnome Genome project at the Everyday Moonday gallery in Seoul

Where else has your work been exhibited outside of the knitting world (or inside it, if you prefer!)?
I was lucky enough to be invited to show my work twice in Berlin for the wonderful character art festival that Pictoplasma holds annually. Like with "The Gnome Genome Project" in Seoul, I took those opportunities to do something really different with Mochimochi Land, and challenge myself to explore new forms that my world can take. I’ve also shown my work in NYC quite a few times, and also in Ann Arbor, thanks to the cool people at the district library there. And I’ve had a blast showing my work at many Vogue Knitting LIVEs around the country. 
Mochimochi Land display at Vogue Knitting Live Chicago 2015

What does MochiMochi Land have in store for us this holiday season? 
I have a fun holiday pattern planned for release that I'm quite fond of! And if all goes well, there will be a little animation starring the new characters coming this December too. 


Anna Hrachovec is a Chicago-based designer and artist who combines her passions for knitting and characters to create cute and weird toys that all ages can get excited about. When she's not designing patterns to share with her fellow knitters, she is working on character-based art pieces and animations. In 2013 and 2014, her creations were featured in animated holiday network IDs on Nickelodeon. 

Anna has written five books of patterns for knitted toys, the newest of which is Adventures in Mochimochi Land, a combination storybook and pattern book. Her patterns and blog can be found at mochimochiland.com. 

#KPrainbow Photo Contest Winners

We've seen so many wonderful photos throughout the last few weeks as part of the #KPrainbow photo contest. Thanks so much to everyone who has participated! You can see many of the wonderful entries we received here on Ravelry or by searching the #KPrainbow hashtag on Twitter, Instagram, or Facebook.

Today we're announcing our lucky winners. If your photo is featured below, please PM us on Ravelry with your shipping address to claim your prize!

Facebook
Congrats to Aemelia Sweeney, who won a  Marblz Interchangeable Set!
Instagram
Congrats to dinasmiles2, who won a  selection of our new Color-Coded Cords and a set of Zooni Bead Stitch Markers!
Twitter
Congrats to @Dancing_Lawn, who won a Set of Knit Blockers!

Ravelry
Congrats to joannethreadhead, who won a Marblz DPN Set!
Thanks again to everyone who participated, we hope you enjoyed the photo contest and would love to continue to see how you use your Knitter's Pride tools! Be sure to share your photos on your social media channel of choice by using the #knitterspride and #kprainbow hashtags!


Introducing: MarblZ

We're excited to introduce our new line of knitting needles, Knitter's Pride MarblZ! These unique new needles are available in a range of eye catching colors which are hand-crafted and specially developed so that each needle has its own unique marbled design.


MarblZ provide just the right 'grab' which allows for easy handling of slippery yarns and makes picking up stitches faster and easier. They are lightweight, smooth, strong, and flexible, featuring sharp, gradually tapered points that are ideal for all styles of knitting. The rave reviews are already coming in for MarblZ! Faye F. recently shared this photo of her MarblZ needles in action and had this to say about them:
I am in love with your Marblz needles! Knitting with them is wonderful, and when I knit in the sun, the light goes through them - it's almost magical! 


MarblZ are available as double pointed, fixed circular, interchangeable circular, and single pointed needles. We also have a special Limited-Edition MarblZ Gift set for the holiday season that includes 9 pairs of needle tips in sizes 4, 5, 6, 7, 8, 9, 10, 10.5, 11; 4 cords; 8 end caps; and 4 cord keys. The set also includes a pen made from our special Symfonie Wood, a set of cord connecters, and a Knitter's Pride needle gauge!


Winner
Congratulations to Ben Beauvais, you're our lucky winner! We'll be in touch to arrange delivery of your Knitter's Pride Nova Platina Starter Set. Thanks to everyone who participated! 

Free Pattern: Crochet Button Bunny + Winner!

Today we have a free crochet pattern from Handmade by Stefanie, a Chicago-based blogger who knits, spins and crochets compulsively in her free time. She originally designed the Button Bunnies as a knitted toy pattern to celebrate the debut of a friend's hand-dyed yarn company, and has always wanted to convert the pattern to crochet for her fellow amigurumi enthusiasts. For a complete list of abbreviations used in this pattern, click here. 


Crochet Button Bunny
By Stefanie Goodwin-Ritter


Yarn:

218 yards worsted weight yarn in MC

shown in Manos del Uruguay Maxima in Sweet Potato

10 yards worsted weight yarn in CC1 for pocket

shown in Manos del Uruguay Clasica in Forest Floor

15 yards worsted weight yarn in CC2 for tail

shown in Manos del Uruguay Maxima in Nickel

Less than 5 yards of black worsted weight yarn for embroidered features

Supplies:

G (4mm) Crochet Hook

Safety eyes – 1 pair 12mm

½” Button - 1

Fiber-fil stuffing

Tapestry Needle
Knitter’s Pride Rejoice Pom Pom Maker - 5.5cm

Gauge: 14 sts = 4” in SC; gauge is not critical for this project

Sizes:
One Size: Bunny will stand approx. 7” tall, excluding ears

Notes: The body, head and ears are all worked continuously onto one piece.

Directions

Body:
Starting with magic loop, ch 2. SC 6 sts in second stitch from hook. Click here for a free magic loop tutorial from FreshStitches (if you're a knitter, it's not what you think)!
Rnd 1: *SC twice in 1 st, repeat from * 5 more times - 12 sts.
Rnd 2: *SC twice in 1 st, repeat from * 11 more times - 24 sts.
Rnd 3: *SC twice in 1 st, SC in 1 st, repeat from * 11 more times - 36 sts.
Rnd 4: *SC twice in 1 st, SC in next 2 sts, repeat from * 11 more times - 48 sts.
Rnd 5: SC in all sts - 48 sts.
Rnd 6: *SC twice in 1 st, SC in next 3 sts, repeat from * 11 more times - 60 sts.

SC all rnds for 2½ inches. I recommend placing a removable stitch marker in Rnd 6 to make measuring easier:

Head :
Rnd 1 (decr): *SC2tog, SC in next 2 sts, repeat from * 14 more times - 45 sts.
Rnd 2: SC in all sts - 45 sts.
Rnd 3 (decr): *SC2tog, SC in 1 st, rep from * 14 more times - 30 sts.

SC all rnds for 2 inches. I recommend placing a removable stitch marker in the same manner as before to make measuring easier.

Remove hook, but don’t fasten off. You will be placing removable stitch markers to use as guides for crocheting the ears.

Get your removable stitch markers ready and fold your bunny in half with the beginning of round at right as follows:


Place markers on the following stitches in round: 4, 12, 18 and 28. The top of your bunny should now look like this: 


You will be crocheting both ears onto the top of the head by working the first and last 3 sts of the round for 2 inches in single crochet to make the first ear, then breaking the yarn and reattaching it at Stitch 13 (where you placed a marker) and working these stitches (13-28) in the round for 2 inches as well. Break yarn. Use tail to sew the tops of each ear closed.  


Arms – Make 2:

Starting with magic loop, ch 2. SC 6 sts in second stitch from hook.

Rnd 1: SC twice in each stitch - 12 sts.

SC in all sts for 5 more rnds. Break yarn and fasten off.

Tail:

Make tail using CC1 with the 5.5cm Rejoice Pom Pom Maker - click here for easy instructions on the Knitter's Pride blog.

Pocket - worked flat:

With CC2, ch 11.
First row: beginning in second st from hook, SC 10 sts, ch 1.
Work 6 more rows SC in all sts.
Buttonhole row: SC in first 4 sts, ch 2 and skip the next 2 sts, SC in last 4 sts.
Continue working in SC for 1 more row. Break yarn and fasten off.

Finishing:  
Stuff body. Weave in ends. Install safety eyes, then lightly stuff ears and arms. Sew top of head together.  Pin arms to side of body and sew on when you are satisfied with their placement. If you need help attaching your bunny's arms, click here for a free tutorial on attaching limbs to amigurumi from FreshStitches. 

Pin tail to bottom center of bunny back and sew on when you are satisfied with its placement.  Using black yarn, embroider a nose on the bunny’s face. Pin pocket to front of bunny and sew on; sew on button to close pocket.

Winner


Congratulations to apeeling, you are the lucky winner of a Waves Crochet Set! We'll be in touch via Ravelry to arrange for the delivery of your prize. Thanks to everyone who participated this month!